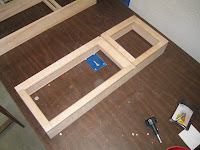
Building a Shaker inspired clock from hard Tiger Maple , together with, one of pine, (top left). The case is rabbit joint construction, wood is 9/16 thick. I purchased the Tiger Maple from my friend
Bob Kloes Bob has the most gorgeous maples I have ever seen, never has he let me down. Ummm, the pine, well that's just box store special.


Took a lot of flipping and flopping to get the grain and curl going the way I wanted. Rail and stile construction using the mini rail and stile bits from
MLCS Woodworking.


I struggled with the door panel. It was milled from a single wide board and had cupped a good deal. I thought I could win the battle by placing the board in traction by wetting with water, then over bending and apply heat and steam. But once the board became acclimated, it bent right back. Enough time was being wasted. So I just wet the cup side, as soon as the wood relaxed, I began working the panel to final size then locked it into the rail & stile frame. So far so good.

 I spray 2 to 3 light coats of General Finishes Vintage Cherry water-based dye stain, straight from the can. Once the dye has dried, I begin by wiping the General Finishes water-based Shaker Maple stain over the dyed surface. Should the stain not take to your surface evenly, use paper towels damp with water and wipe the surface to pull the excess stain off. This is probably just a good idea anyway, for even color.
 Now to the cool part, this allows you to achieve deeper color. First, I shoot a water-based topcoat over the dry Shaker Maple stain. In this case, I'm using the EM6000 production lacquer from Target Coatings and that will amber a bit like solvent nitro lacquer. Second, once the lacquer has dried, I lightly wipe with 320 paper and clean my surface. Then I glaze with the same Shaker Maple stain. So now we have stacked our color, which give's depth to your project and by the same token, will aid to even your color as well.
 Once the stain has dried I shoot 2 coats about 2/3 mils thick (the point where your wet film finish starts to look blue) and call it done.


